
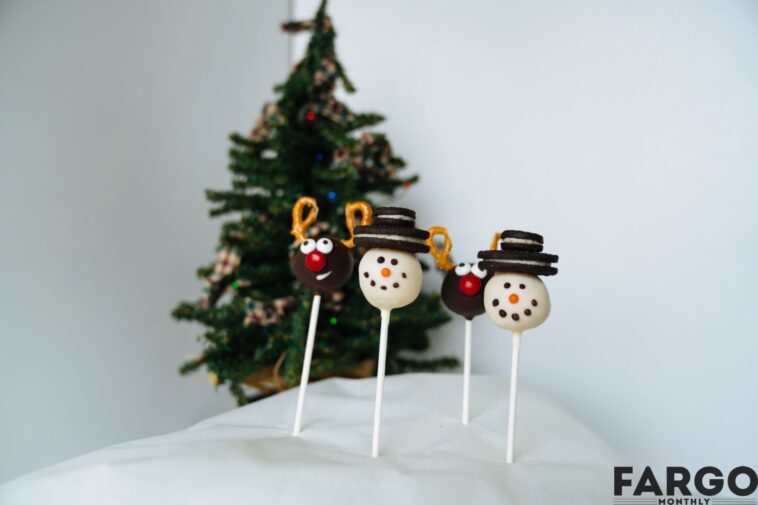
Photo by Nolan P. Schimdt
Cake pops may be adorable, but don’t let their cuteness fool you as they can be a bit tricky. Fortunately, you’ve got a seasoned cake pop maker guiding you through the process! Come along as we roll, dip and decorate!
Cake Pops Recipe:
Yield 40-48 cake pops (depende on size)
Ingredients
9×13 cake: From the box or made from scratch either option works great.
Baked and coled completely.
16 oz. frosting 1 container of pre-made frosting (any flavor works) of 16 oz of homemade buttercream.
24 oz. white chocolate/vanilla melting wafers
24 oz. milk or semisweet chocolate melting wafers: Can be found at most craft supply stores or online.
Noted: Melting wafers work much better than using chocolate chips.
Supplies/Decorations:
48-6 inch paper lollipop sticks
Handful of toothpicks
1.5 tablespoon cookie scoop
Wooden block with holes
(barely larger than the diameter of the paper lollipop sticks) or styrofoam block (can be reused multiple times)
For snowmen:
24 standard size Oreo cookies
24 mini Oreo cookies
Orange TicTac or some other small orange candy or sprinkle for the nose
For reindeer:
48 candy eyeballs (can find at most local craf stores or online)
24 red hots or red M&Ms or another round red candy
48 mini pretzels, cut in half
Step 1: Prepare the Cake
The first step is to make sure your cake is cooled completely. If you introduce warm cake to the frosting you will end up with a goopy mess that will not roll nicely.
Once your cake is cooled completely you can either run it through the food processor to the point of find crmnls or you can crumble it by hand, making sure the pieces are as small as you can get them.
Step 2: Add the Frosting
You want your frosting at room temperature before adding it to the cake. Add half the frosting to the cooled crumbled cake and mix thoroughly (can be in a stand mixer using a hand mixer or mix thoroughly by hand).
Note: You will not need the entire 16 oz. of frosting!
Grab a couple of tablespoons of the mixture and roll it in your hands. If it crumbles and doesn’t securely hold together, add some more frosting. If it’s goopy and doesn’t hold shape, too much frosting has been added and you need to make more cake (this is why I recommend adding frosting in intervals to avoid getting to this point). The goal is to be able to roll the cake mixture into a ball where it holds shape and does not crumble.
Step 3: Scoop and Refrigerate
I like to use a 1.5 tablespoon cookie scoop to portion my cake pops. It’s a good size to decorate with and a nice few bites, roughly the size of a golf ball. You can make them larger if you’d like but will end up with a smaller yield. I wouldn’t recommend making the pops any smaller as they would be hard to decorate. You can also portion by hand as a cookie scoop is not required.
Once portioned, place the cake pops in an airtight container and stick them in the fridge, preferable overnight but for at least 4 hours.
Step 4: Dip & Decorate
There are 3 major keys to success with this step.
- Follow the instructions on the chocolate melting water packaging. If the chocolate does not smoothly stream off a spoon when lifted, you can add a teaspoon or two of vegetable shortening to thin it. You want it to smoothly coat your cake pops.
- Making sure you ‘glue’ the stick to the cake pops with melted chocolate and push it nearly all the way through the cake pop. This helps make sure the cake pop does not fall off the stick when you go to tap the excess chocolate off.
- Mis en Place. Chocolate melting wafers are designed to set more quickly than regular chocolate. This means you want to have all your decorations handy and work in batches.
- Now you’re set for success! Remember though—if it falls off the stick or looks ridiculous and nothing like you intended it to, it’s still going to taste great.
Snowmen
Melt your white chocolate according to instructions.
Working in batches of six cake pops ( you can add more as you become more efficient) roll your pops into round calls. Dip the paper lollipop stick about 1 inch into the melted white chocolate and push through the center of the cake pop, pushing nearly all the way through. Repeat with the other five cake pops and let sit until the white chocolate sets. For each snowman, you will need one standard Oreo cookie, one mini Oreo cookie, one orange nose, and a toothpick (with some melted semisweet or milk chocolate handy for decorating).
Holding by the stick, fully submerge the cake pop into the white chocolate, twisting it through the chocolate. You do not want to do straight up and down as that movement may result in the cake pop being sucked off the stick. HOlding at an angle, gently tap the stick on the edge of the bowl or cup of melted white chocolate until only a very thin stream of white chocolate drips off the cake pop. GIve it a little twist, a few gentle taps, and get to decorating before it sets!
Place the standard Oree on top of the cake pop. Place the orange nose in the center of the face of the snowman. Using a toothpick, use the melted white chocolate as ‘glue’ to secure the mini Oreo cookie on top of the standard cookie.
Once the white chocolate has set, you can use a toothpick dipped in milk or semisweet chocolate wafers to draw on the eyes and mouths.Feel free to get creative with this!Repeare until half your cake pops have been dipped.
For the reindeed the steps are smiliar bt the decorations are different. You’ll be using the milk or swemisweet chocolate for dipping the cake op into. You’ll secure the stick, dip fully and then decorate as follows before the choocolate the chocolate sets (if the chocolate sets before you get everything on, no worries!You can se a toothpick + melted chocolate to ‘glue’ on any missing parts).
Once dipped and you have tapped the excess chocolate off, place the red nose in the center of the front of the cake pop (where the face will be). Place the eyes directly above the nose. Use on-half pretzel for each antler on the top of the head. If you’d like you can use more chocolate or white chocolate to draw on faces.
These keep in the fridge for up to a week and you can freeze the cake and frosting portion. Just thaw in the fridge overnight before dipping. This makes for an adorable gift and a fun activity for adults and children alike.


